

HOW TO MAKE HOMEMADE PECORINO CHEESE
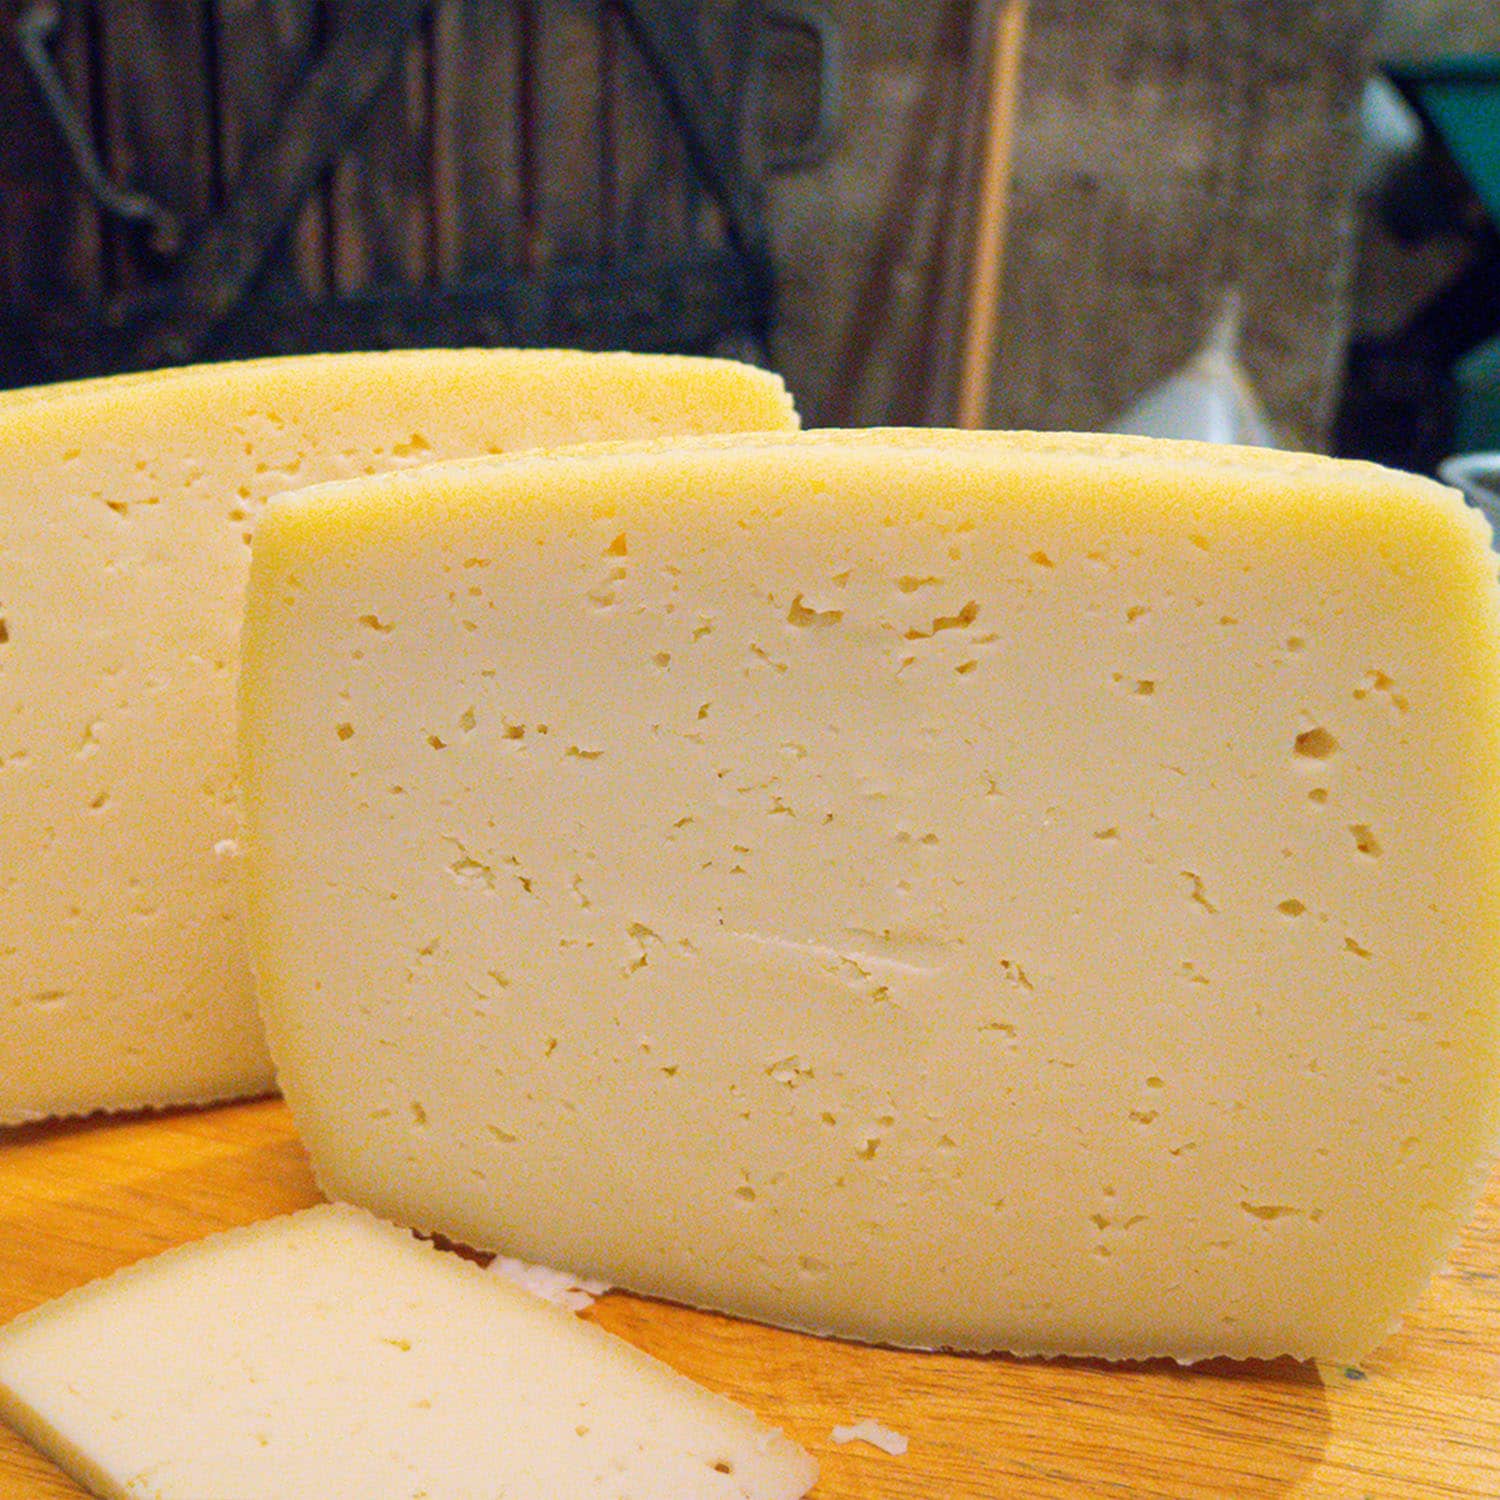
One of the most popular cheeses in all of Italy (and my favourite) is Pecorino and it is made all over Abruzzo. This cheese is made from sheep’s milk and is creamy, crumbly, and tastes amazing. It’s perfect for pasta, on top of pizzas or salads, and even in soups. Pecorino cheese is easy to buy from the store…but nothing compares to taking the time to make it at home.
Pecorino only takes a few ingredients to make, add in a sprinkle of patience and you end uo with a few pounds of beautifully creamy and aromatic cheese that you can store in your fridge and use for a variety of recipes. I always have an endless supply!
Watch the Pecorino Cheese video recipe:
How to make PECORINO CHEESE at Home Like an Italian Cheesemaker

Vincenzo’s Plate Tips
Press the Curds
When removing the curds from the pot and straining them, it’s essential to get all the liquid out of the curds by pressing them. The more of this liquid, called whey, remains in the cheese, the more bitter it will become when it is seasoned. So make sure to press the juices out of the curds. Remember to flip over and press it again to ensure you get the whey out.
Put a Damp Towel in the Fridge
When controlling the humidity, you can put a damp kitchen towel at the bottom of the refrigerator to help raise the humidity to your desired level.
Season the Cheese for a Few Months
Generally, you want to season the cheese for at least three to four months in the fridge before you cut it open and enjoy it. Some pecorino cheeses are even aged for a year! The amount of time is up to personal preference regarding consistency and taste. The longer you season it, the firmer and crumblier the cheese becomes. It will also develop stronger, saltier flavors.
Don’t be deterred by the mold!
When you check on your cheese after a couple of months in the fridge, if you find mold on the ou rind don’t worry. It actually adds flavor! If the rind is hard and not cracked, the mold cannot get inside the cheese and will only add a stronger taste to it.
If there’s too much mold, you can brush it away. And if you don’t want any mold, you can put a mixture of oil and vinegar onto the rind to prevent it from growing altogether.
Vacuum Seal the Cheese
Once the cheese has aeasoned in the fridge, you can cut up the pecorino wheel into smaller wedges and vacuum seal them. This will stop the seasoning of the cheese, lock in the flavor, and allow you to store them in the fridge for an extended period.

How to Serve Pecorino Cheese
The serving options for my favourite Pecorino cheese are endless! The simple way is to cut it into wedges and enjoy it by the slice with some fresh sourdough bread. But you can also grate it on pizza, add it to your next Carbonara dish. You can also crumble it onto salads! However you like it, you should be proud of you.

Pecorino Cheese Recipe
Equipment
- Thermometer
- Metal strainer
- Straining containers
- Extra-large pot
- knife
- Whisk
- Metal spoon
- Small cup
- Wooden Bowl
- Large container or high-walled baking tray
- Humidity gauge
- Vacuum seal bags to store cheese
Ingredients
- Sheep Milk
- Whey
- Organic powdered rennet preferably calf rennet
- Coarse salt
Instructions
Making Pecorino Cheese
- Pour the sheep milk through a metal strainer and into your cooking pot to avoid getting the heavy cream into the pot. Add whey to the milk and stir.
- Over medium heat, warm up the milk to 40°C (104° F), making sure to stir the mixture periodically. Once it hits the right temperature, remove the pot from the heat.
- In a small cup, pour the powdered rennet into water. Stir until completely dissolved. Add it to the milk by evenly distributing the rennet mixture around the pot. Stir the pot to make sure everything is well combined. Cover the pot and let it rest for 20 minutes.
- Uncover the pot and touch the curd a few times with your finger. If it comes out clean, you are ready to move on to the next step.
- Using a knife, cut the curd in the pot into small squares to separate the solid from the liquid whey. Cover and wait another 15 minutes.
- Using a whisk, break the curd into small, uniform pieces. Start by slowly stirring until the squares are broken into tiny pieces, and then start whisking faster. Cover and let the curd rest for another 10-15 minutes.
- Reach your hand into the bottom of the pot and slowly start delicately moving the curd into one solid mass, squeezing the curd as you collect it together.
- Remove one large piece of the curd out of the pot at a time. Place them into straining containers that have been placed inside a large container that can collect the excess liquid you strain out.
- Using a fist, start pressing down on the curd to force out the whey liquid. Make sure to press hard to force out the whey from the curd. Flip the cheese over and continue pressing.
- Once pressed, give the cheese a quick bath back inside the pot by submerging it into the water and taking it back out. Repeat the pressing process.
- Store in the fridge for 24 hours.
Seasoning the Cheese
- After 24 hours, lightly salt the cheese on all sides using coarse salt.
- Now it's time to store the cheese long-term in the fridge to season fully. The ideal storage temperature is 10°C (50°F) with a humidity between 67-80%.
- Store the cheese uncovered in a wooden bowl. Season the cheese in the fridge for 3 to 4 months minimum.
- After the seasoning is complete, the cheese is ready! You can store it in a vacuum-sealed bag to halt seasoning and store it long-term in the fridge.
Video
E ora si mangia, Vincenzo’s Plate….Enjoy!

Join my private exclusive Italian Tours “Italy Unexplored Tour” and experience the Real Italy like you have never seen before.
The tour is exclusive to only 10 passionate foodies and it’s very unique. (Click here to get more details)
Tempted? Watch the video below and enjoy the sightseeing of the greenest region in Europe
Subscribe to my Youtube Channel: www.youtube.com/vincenzosplate


I’ve always loved Pecorino cheese, so I was excited to come across this recipe for homemade Pecorino. The video tutorial and tips provided by Vincenzo made the process seem doable even for a novice like me. I can’t wait to try making my own and taste the difference compared to store-bought!
I haven’t tried this yet but plan to soon. I am researching and looking at different recipes. Am I missing something? I do not see any measurments for the ingredients.
You’re right, the recipe you linked doesn’t include any measurements for the ingredients. This is because it’s a more traditional recipe that’s meant to be passed down from generation to generation. The measurements are left up to the cook’s discretion, based on their own experience and preferences.